
 By Muhammad Irfan Liaqat
How to Remove Image Backgrounds for Free (No Photoshop, No Sign-Up)
Remove backgrounds from photos in seconds — right in your browser. No software, no account, no upload to sketchy servers. Here's exactly how to do it.
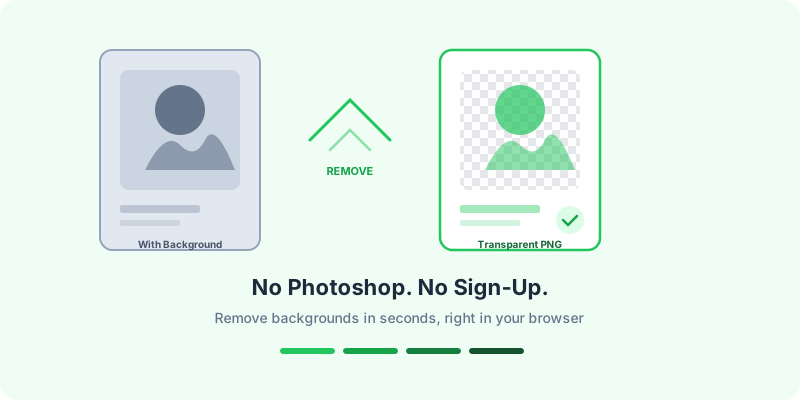
I spent forty-five minutes last week trying to remove the background from a product photo. Forty-five minutes. I had a white mug on a slightly off-white table, and Photoshop's magic wand kept selecting chunks of the mug along with the background. Select, undo, feather, try again, swear quietly, repeat.
Then my friend walked over, watched me struggle for about ten seconds, and said: "Why aren't you using a browser tool for that?"
I felt a little embarrassed. I'd been wrestling with layer masks and edge refinement when the whole thing could've been done in about five seconds. And that experience is exactly why I'm writing this — because a lot of people are still stuck in the Photoshop-or-nothing mindset when it comes to background removal.
Why People Need Background Removal
Before we get into the how-to, let's talk about the why. You'd be surprised how many everyday situations call for a transparent background:
Selling stuff online. Product photos with clean, white (or transparent) backgrounds look professional. Amazon actually requires white backgrounds for main product images. Etsy sellers with clean product photos get significantly more clicks.
Work presentations. Nothing screams "I made this in five minutes" louder than a product screenshot with a random desktop background visible behind it. A transparent PNG dropped into a slide deck looks intentional.
Social media graphics. If you're making Instagram carousels, YouTube thumbnails, or LinkedIn banners, you'll eventually need to layer a photo of a person or object over a designed background. That means removing the original background first.
Personal projects. Wedding invitations, birthday cards, team photos for a club website, headshots for a portfolio. The list never ends.
The Problem with Most Background Removers
I've tested a lot of these tools over the years. The market is flooded with them. And most of them share the same annoying pattern:
1. You upload your image
2. The tool removes the background (usually pretty well, actually)
3. You click download
4. Paywall. The high-res version costs money. Or the free version has a watermark. Or you need to create an account first.
Some tools are upfront about this. Others let you do all the work and then hit you with the paywall right at the download button. That one stings.
And then there's the privacy angle. When you upload a photo to an online background remover, that image goes to somebody's server. Maybe it gets processed and deleted. Maybe it doesn't. You're trusting a random website with photos that might include your face, your products, your client's work, or your kids' birthday party.
How to Remove Backgrounds Without Any of That
Here's the approach I use now, and it takes about ten seconds:
Step 1: Open the tool
Go to the Background Remover on Alventra.io. No account creation. No email. Just the tool.
Step 2: Upload your image
Drag and drop your image, or click to browse. It accepts JPG, PNG, and WebP files. The image loads instantly because nothing is being uploaded to a server — it stays on your device.
Step 3: Adjust the settings (if needed)
Two sliders control the result:
Tolerance controls how aggressively the tool removes colors similar to the background. Start around 30-40 for photos with a clearly different background color. Crank it higher for backgrounds that are close in color to your subject.
Edge softness smooths the transition between the subject and the removed area. A little softness (2-5px) usually gives the most natural-looking edge.
Step 4: Download
Click download. You get a transparent PNG. Done. No watermark, no paywall, no "sign up for HD."
What Kind of Backgrounds Work Best?
Let me be honest about this because most articles won't tell you: no free tool handles every background perfectly. But some backgrounds are much easier than others.
Easy (great results):
• Solid white or light-colored backgrounds
• Green screens or blue screens
• Studio-shot product photos on seamless backdrops
• Headshots taken against a plain wall
Medium (needs adjustment):
• Outdoor photos where the sky contrasts well with the subject
• Images where the subject has clean edges
• Slightly textured backgrounds (concrete walls, simple patterns)
Difficult (may need manual cleanup):
• Hair against busy backgrounds (the eternal nemesis of every background remover)
• Subjects that are similar in color to the background
• Complex, multi-colored backgrounds
• Transparent or semi-transparent objects (glass, water)
For the difficult cases, you might still need Photoshop or a tool that uses AI-based segmentation. But for 80% of everyday use cases — product photos, headshots, simple graphics — a browser-based tool handles it perfectly.
Tips for Getting the Cleanest Results
These small things make a surprisingly big difference:
Start with good photos. Garbage in, garbage out. If your photo is blurry, poorly lit, or has the subject blending into the background, no tool will save it. Spend an extra thirty seconds taking a better photo with good lighting and contrast.
Shoot against a contrasting background. Photographing a white product? Don't put it on a white table. Use a black or colored backdrop. The more contrast between your subject and the background, the cleaner the removal.
Crop before removing the background. If there's a lot of extra space around your subject, crop it first. This reduces the chance of the tool misidentifying parts of the background.
Compress after, not before. Remove the background first, then compress the PNG file with the Image Compressor. Compressing before removal can introduce artifacts that confuse the background detection.
Save as PNG, not JPG. This one catches people. JPEG doesn't support transparency. If you save your cutout as a JPG, you'll get a white background instead of a transparent one. Always use PNG for images with transparency.
The Photoshop Tax
I want to address this directly because it comes up every time I talk about free tools: "Why wouldn't you just use Photoshop?"
Here's why:
Photoshop costs $22.99/month. That's $276 per year to remove backgrounds from product photos a few times a week.
The learning curve is real. Layer masks, edge refinement, select and mask, refine edge brush, decontaminate colors — these are powerful features, but they take hours to learn properly.
It's overkill. Using Photoshop to remove a background from a product photo is like hiring a construction crew to hang a picture frame. It works, but there are faster options.
For professional photographers and designers who live in Photoshop eight hours a day, it absolutely makes sense to use it for background removal. They already know the tools, they have the subscription, and they need the pixel-level control.
For everyone else — small business owners, social media managers, students, Etsy sellers, anyone who needs a transparent PNG and needs it now — a browser-based tool is faster, free, and private.
What I Actually Use Day to Day
My personal workflow for product photos:
1. Shoot the product on a simple, contrasting background
2. Transfer the photos to my laptop
3. Open Background Remover, drop the image, adjust tolerance
4. Download the transparent PNG
5. If needed, compress the PNG to bring the file size down
6. If I need a different format, convert it to WebP for the website
Total time per image: about fifteen seconds. No subscriptions. No uploads to third-party servers. The images never leave my laptop.
That last part matters more than people think. I work with client products. Those product photos are often pre-launch, under NDA, or just not something I want sitting on someone else's server. Knowing that everything stays local gives me peace of mind.
One More Thing
If you're removing backgrounds for product photos that will go on a website, remember to optimize the final file size. Transparent PNGs can be large — a single product photo with a transparent background can easily hit 2-3 MB. Run it through the Image Compressor and you'll typically get it under 500 KB without any visible difference.
Your customers won't notice the compression. They will notice if your page takes six seconds to load.