
 By Muhammad Irfan Liaqat
How to Resize Images for Social Media Without Ruining Them
Every social platform wants different image sizes. Here's a no-nonsense guide to getting your photos and graphics looking sharp on Instagram, Facebook, LinkedIn, and X.
I spent way too long last week trying to upload a banner to LinkedIn. The image looked great on my screen. On LinkedIn? Cropped in all the wrong places, my face half cut off, the text unreadable. Classic.
Here's the thing nobody tells you when you start posting online: every single platform has its own preferred image dimensions. And if you don't match them, the platform will "helpfully" crop your image for you. Usually badly.
So I put together this guide — not the kind that just dumps a table of numbers on you, but one that actually explains what works and why.
Why Getting Image Sizes Right Actually Matters
You might think, "it's just a photo, who cares if it's a little off?" Well:
Cropped images look unprofessional. If your profile picture cuts off at your forehead, people notice.
Blurry images kill engagement. Upload something too small and the platform stretches it. Everything goes fuzzy.
Oversized files load slowly. A 5 MB hero image on your Facebook page? Your audience scrolled past before it finished loading.
Getting the dimensions right takes maybe 30 seconds with the right tool. The payoff is worth it.
The Sizes You Actually Need in 2026
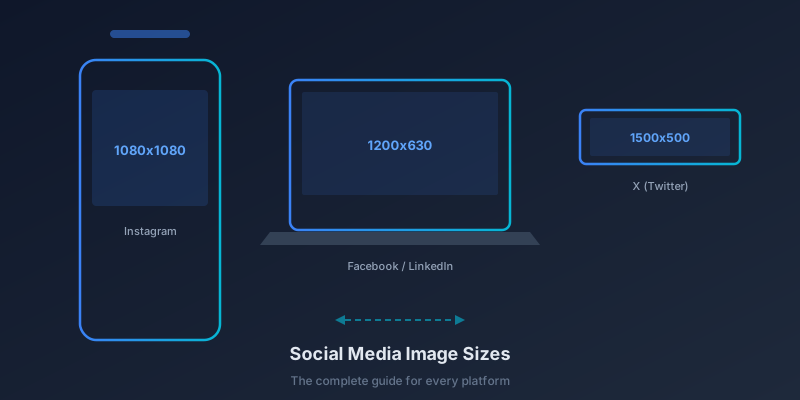
I'm not going to list every obscure dimension. Here are the ones that matter for 90% of people:
| Type | Size (px) | Aspect Ratio |
|---|---|---|
| Profile Photo | 320 x 320 | 1:1 |
| Square Post | 1080 x 1080 | 1:1 |
| Portrait Post | 1080 x 1350 | 4:5 |
| Story / Reel | 1080 x 1920 | 9:16 |
The portrait format (1080 x 1350) gets more screen real estate in the feed than square. If you're posting photos, this is the one to use. For graphics and carousels, square still works fine.
| Type | Size (px) | Aspect Ratio |
|---|---|---|
| Profile Photo | 170 x 170 | 1:1 |
| Cover Photo | 820 x 312 | 2.63:1 |
| Shared Image | 1200 x 630 | 1.91:1 |
| Event Cover | 1920 x 1005 | 1.91:1 |
That shared image size (1200 x 630) is the most important one. It's also the same ratio used for Open Graph images — the preview that shows when someone shares your link.
| Type | Size (px) | Aspect Ratio |
|---|---|---|
| Profile Photo | 400 x 400 | 1:1 |
| Background | 1584 x 396 | 4:1 |
| Shared Image | 1200 x 627 | 1.91:1 |
| Company Logo | 300 x 300 | 1:1 |
LinkedIn's background banner is weirdly wide. If you put text in it, keep it centered — the edges get cropped on mobile.
X (Twitter)
| Type | Size (px) | Aspect Ratio |
|---|---|---|
| Profile Photo | 400 x 400 | 1:1 |
| Header | 1500 x 500 | 3:1 |
| In-stream Image | 1200 x 675 | 16:9 |
| Card Image | 800 x 418 | 1.91:1 |
How I Actually Resize Images (My Workflow)
Honestly, I used to open Photoshop for this. Which is like driving a semi truck to the grocery store. Now I just use browser-based tools because they're faster and I don't need to install anything.
Here's my process:
1. Crop first, resize second
This is the mistake most people make — they resize the whole image and then wonder why the composition looks off. Start by cropping to get the framing right. Our Image Cropper lets you set exact aspect ratios, which is a lifesaver when you need that precise 4:5 for Instagram.
2. Resize to the target dimensions
Once your crop looks good, resize it to the exact pixel dimensions the platform wants. Don't just eyeball it. Use the Image Resizer — punch in the width and height, done.
3. Compress before uploading
This step is optional but recommended. Social platforms compress your images anyway when you upload them. If you compress first with better settings, you maintain more control over the quality. The Image Compressor typically cuts file size by 60-70% without visible quality loss.
Common Mistakes to Avoid
Uploading screenshots directly. Screenshots are usually PNG files and much larger than necessary. Convert them to JPEG first.
Ignoring mobile. More than 80% of social media usage is on phones. That beautiful wide banner might look great on your desktop but terrible on a 6-inch screen. Always check how your image looks on mobile before posting.
Using text-heavy images at small sizes. If your image has text, make the font bigger than you think you need. Seriously. What looks readable at full size becomes illegible as a tiny thumbnail in someone's feed.
Forgetting about safe zones. Platforms often overlay UI elements on your images — profile icons, buttons, timestamps. Keep important content away from the edges and corners.
The One Size That Works Almost Everywhere
If you're in a rush and need one size that works reasonably well across most platforms: 1200 x 630 pixels. It's the standard OG (Open Graph) size. Facebook, LinkedIn, X, Slack, Discord — they all display this size nicely when someone shares a link.
It won't be perfect for Instagram posts or stories, but for general sharing? It's your safe bet.
Quick Reference Cheat Sheet
Getting your image sizes right isn't glamorous work. But it's the difference between looking like you know what you're doing and looking like you just discovered the internet yesterday.